Port Forwarding on Windows VPS| A Complete Gu
💡 Note: Check out Cloudzy’s Windows VPS, optimized...

Do you wish to enable RDP in Windows Server 2016? Need to establish remote connections but don’t know how to do so? Want to configure remote desktop using Command Prompt or PowerShell terminal? This how-to tutorial will answer your questions and help you with the configuration.
[lwptoc]In a previous article, we have explained how to enable RDP in Windows Server 2012. Now, it’s time to tell you about Windows Server 2016, and explain how you can enable Remote Desktop in Windows Server 2016. But let’s start with a brief history of Windows Server 2016.
Windows Server 2016 is the successor to Windows Server 2012 R2 released in October 2016. This is the seventh release of Windows Server families.
[rh-cta-rdp type=”2″]And client updates ( including Remote Desktop preview app for Windows 10, and Remote Desktop preview app for Mac)
As you see, Windows Server 2016 comes with brand new features that Allow Remote Desktop and better connections. Here, we will tell you how to enable RDP in Windows Server 2016.
As you know, Graphic User Interface (GUI) allows for remote access to Windows Server 2016. So, when it comes to enabling RDP in Windows Server 2016 via Logging into the GUI, your first requirement is the installation of a Graphic User Interface. After installing the GUI, do the following steps:
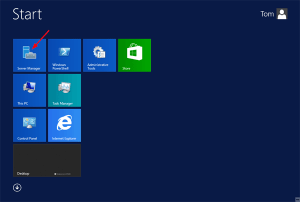
Open Server Manager
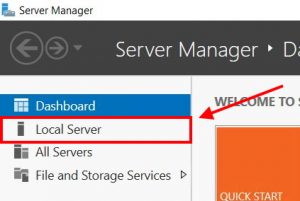
Click Local Server from the left panel
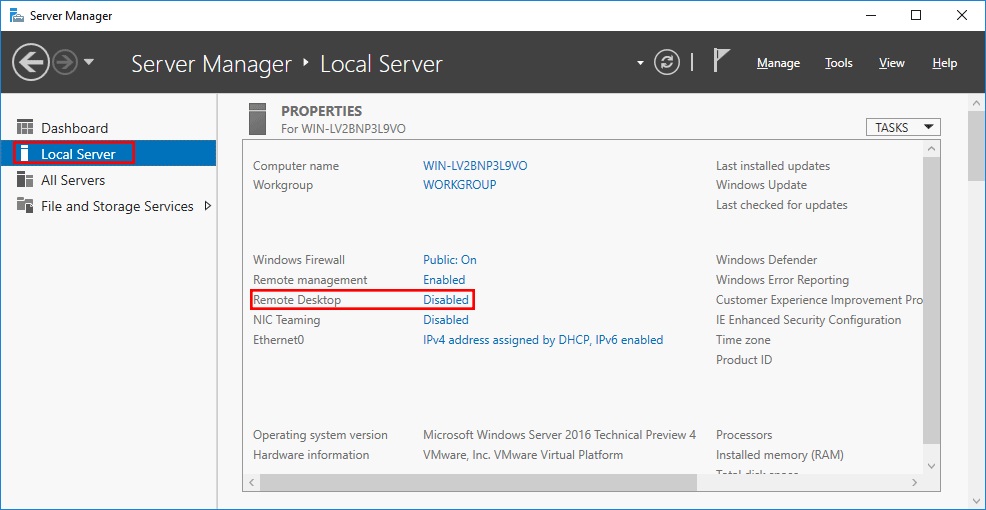
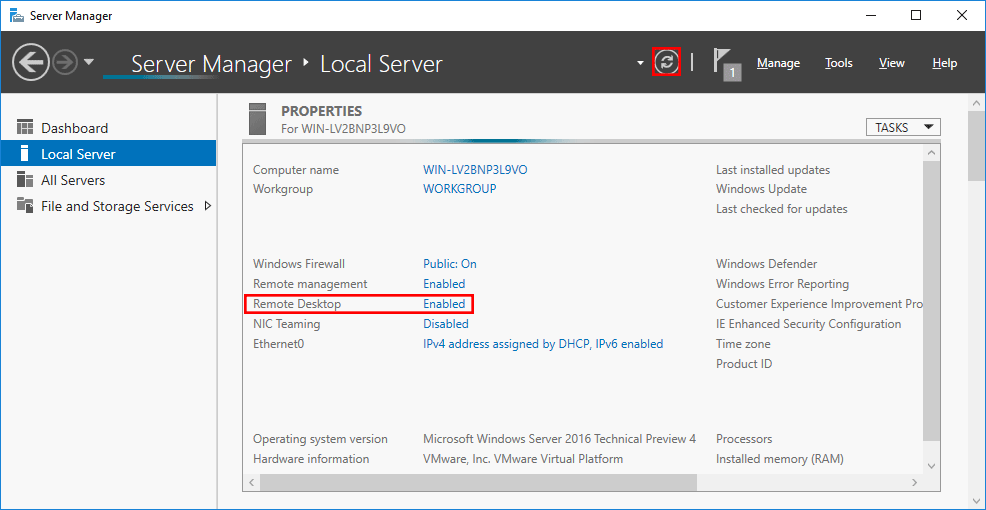
Find the Remote Desktop option and click Disabled as shown in the following picture
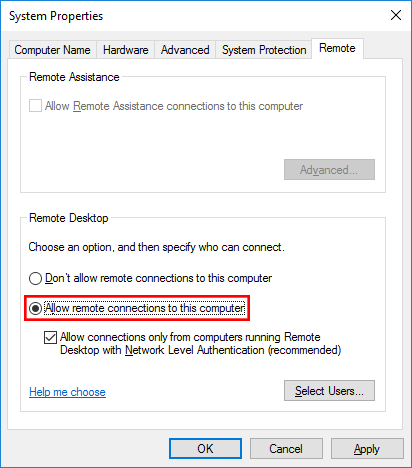
In this step, a new window will appear. In System Properties Window, enable the Allow remote connections to this computer In this part, you can decide whether to choose Network Level Authentication (NLA) or not. You can also, add more users here.
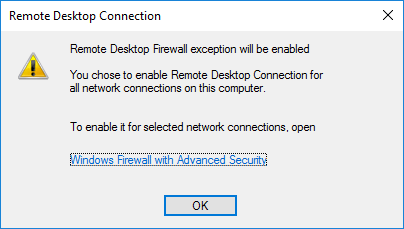
Once, you configure all required settings, you will see a message to enable the corresponding Windows Firewall rule. The Remote Desktop Connection Window helps you to establish remote desktop connections, so click OK to confirm the configuration.
Now, move back to the Server Manager window. In this window, select the Refresh button as highlighted below to set the changes. Congratulation. You configured a remote desktop.
PowerShell is an object-oriented command environment that has new features in Windows Server 2016. It utilizes small programs called cmdlets to simplify the management, administration, and configuration of heterogeneous environments.
To enable Remote Desktop in Windows Server 2016 via PowerShell, we can use two cmdlets. The first will enable remote desktop and the second will open the Firewall. They are listed here:
Set-ItemProperty -Path "HKLM:SYSTEMCurrentControlSetControlTerminal Server" -Name "fdenyTSXonnections" -Value 0
Enable-NetFirewallRule -DisplayGroup "Remote Desktop"
As you see, PowerShell enables RDP with these commands. Notice that administrators can remote in by default, while to provide non-admin users permission to Remote Desktop access, you should add them to the Remote Desktop Users’ local group.
[rh-cta-rdp type=”2″]Well, one of the answers to the “How to Enable RDP in Windows Server 2016” question is using PowerShell Terminal. In order to do this, you should follow the instructions below.
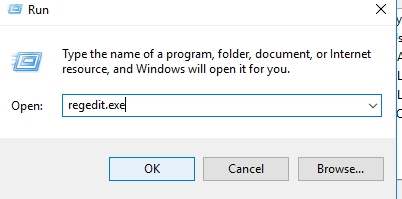
1- Click Windows + R key to open Run Window;
2- In this window, type regedit.exe and press OK;
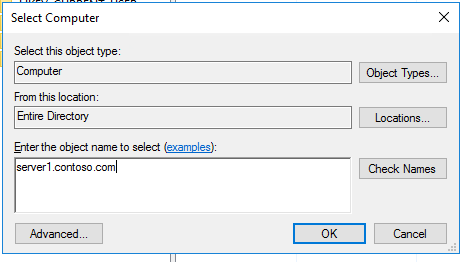
3- In Registry Editor, select File and then select Connect Network Registry;
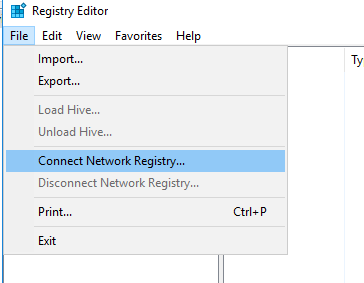
4- Specify the IP address or hostname of the remote computer and press But remember that:
If the remote computer could not authorize you as a current user, then a credential is needed.
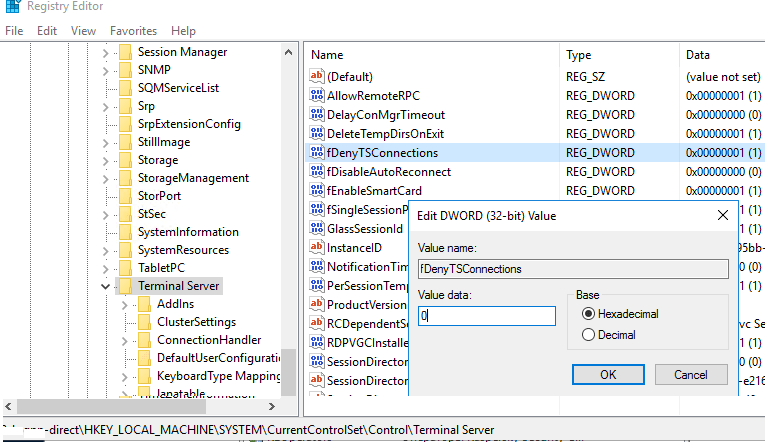
5- Now, the Registry Editor Panel appears. In this stage try to find “HKLMSYSTEMCurrentControlSetControlTerminal Server” and change the DWORD value of the fDenyTSConnections parameter from 1 to 0, and press OK;
6- Now, it’s time to add one of the firewall rules in the Windows Firewall. This rule allows remote connections. You can add it via PowerShell Remoting, using PS exec, or using a GPO (Group Policy Object). Go to the Command Prompt and type the following code:
PsExec.exe \server1 -u contosoadmin -p password cmdnetsh advfirewall firewall add rule name="allow RemoteDesktop" dir=in protocol=TCP localport=3389 action=allowshutdown –f –r –t
7- Reboot your system and try to connect to a remote computer.
Note:
8- For more information about how to set firewall rules in Windows firewall, run the following command:
netsh advfirewall firewall add rule ?
9- Make sure to run all these codes in administrator mode. To do so, do the following:
Click on Start, type CMD, then right-click on Command Prompt and choose Run as Administrator.
In this article, we learned how to enable RDP in Windows Server 2016 using various methods. We can mention one extra method here. By default, windows server 2016 sets external Remote Desktop Access to disabled. We can easily enable it using Server Manager (as we explained in a previous article named “how to enable RDP in Windows Server 2012”). So you can also use server manager to enable remote connections via Windows Server 2016. Do you know any more methods? Please share with us.
An SEO-Specialist who loves digital marketing and has a background in creating content. Matt loves teamwork and enjoys working with professional people. He always tries to bring more things to the team.

💡 Note: Check out Cloudzy’s Windows VPS, optimized...

Corrupted Windows files are bad news for any user, be i...

TeamSpeak is a great VoIP (Voice over Internet Protocol...