

If you are an online gamer, you definitely have heard of TeamSpeak or have heard of it before. TeamSpeak is one of the most commonly-used VoIP (Voice over Internet Protocol) solutions among online gamers. With TeamSpeak, you can voice chat with your team members, friends, and coworkers securely with low latency and across different platforms.
[lwptoc]If you need to use TeamSpeak, you need to understand how to install it. The process might be a little confusing because you have to set up the TeamSpeak server. In this blog post, I will walk you through the guide on how to set up TeamSpeak server on Linux step-by-step. By the end of this blog post, you will learn how to set up the server on Debian 9, Ubuntu, and CentOS. So buckle up!
[rh-cta-teamspeak type=”2″ ]How to SetUp TeamSpeak Server on Linux?
There are four steps in setting up the protocol. Follow the following steps carefully, and you will be good to go:
1- Install the Necessary Utilities
First, you need to know that the TeamSpeak 3 server does not require additional libraries to run on Debian 9.
However, if you want to download and remove server software, you need to install Wget download manager and bzip2 to extract the server software. Use the following commands to install these necessary utilities:
sudo apt-get update
sudo apt-get install wget bzip2
Now that you have the necessary software let’s move forward and install the server software.
[rh-cta-debian type=”2″ ]2- Download and Install the TeamSpeak 3 Server
First, you need to download the latest TeamSpeak 3 software. After the download is complete, extract the server program following this command:
tar xfvj teamspeak3-server_linux_amd64-3.0.13.8.tar.bz2
After this step, you can run the server.
[rh-cta-linux type=”2″]3- Run the TeamSpeak Server
You need to change to the TeamSpeak server directory. This directory was created automatically when the server software was extracted. Follow this command to run the server:
$ cd teamspeak3-server_linux_amd64
/teamspeak3-server_linux_amd64$ ./ts3server_startscript.sh start
Running the server for the first time might take approximately one to three minutes. After the first start is finished, you will get the following output:
I M P O R T A N T
Server Query Admin Account created
loginname= “aloginname”, password= “aloginpassword”
I M P O R T A N T
ServerAdmin privilege key created, please use it to gain
serveradmin rights for your virtualserver. please
also check the doc/privilegekey_guide.txt for details.
token= a40characterstoken
The server query admin account is needed in emergencies. For example, if you lost your TeamSpeak user data or went through hacker attacks. Make sure to write the admin account loginname and password somewhere safe or in a password database.
Finally, to make sure that your server is running correctly, you can follow this command:
user@server:~/teamspeak3-server_linux_amd64$ ./ts3server_startscript.sh status
Your TeamSpeak server is now running.
4- Connect to a New Server
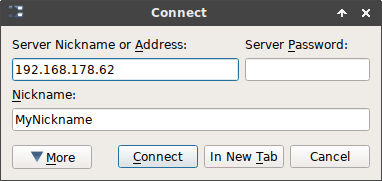
Run the TeamSpeak 3 client and click on Connections > Connect or use the CTRL+S hotkey to connect to the server. In the following dialog, enter your server’s IP address or name, choose the nickname you want to use on that server, and click on the Connect button.
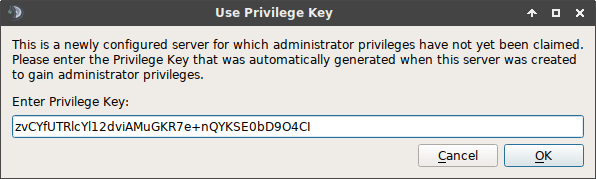
Insert the token in the dialog box as follows:
Now you should see a new symbol beside your nickname which means that you are now an admin. You should be able to build channels or server groups, edit server names, and so on. Your TeamSpeak 3 server is now completely set up. You can close your SSH connection to your server, start sharing your server address with your friends and start chatting.
TeamSpeak Update
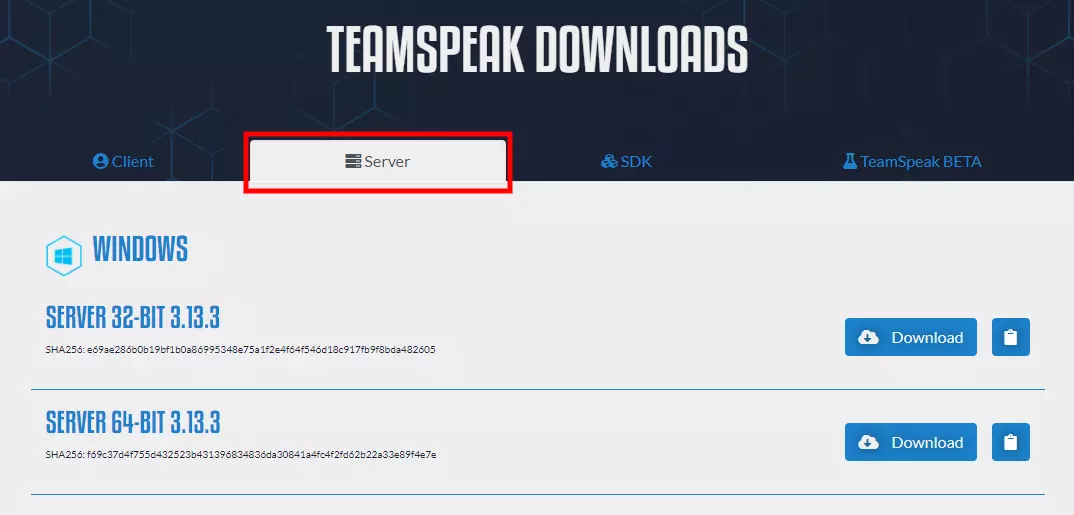
The TeamSpeak software is usually pretty stable, but you can always ensure that your server is up-to-date. To update the TeamSpeak server, simply go to the official TeamSpeak homepage, download the latest version, and extract it.
Remember, before extracting the update you have to stop the TeamSpeak 3 server. To do so, follow these commands:
user@server:~$ cd teamspeak3-server_linux_amd64
user@server:~/teamspeak3-server_linux_amd64$ ./ts3server_startscript.sh stop
Now, you can extract the update and run the server again using this command:
user@server:~/teamspeak3-server_linux_amd64$ ./ts3server_startscript.sh start
Also Read: How to set up a Teamspeak server on Windows?
How to Set up a TeamSpeak 3 Server on Ubuntu
Below are the steps you need to follow to run a Teamspeak 3 server on Ubuntu. First of all, log in to your virtual server via an SSH connection.
1- Update your system
Follow the commands below to make sure your system is updated:
apt-get update && apt-get upgrade
2- Create a user
Create a user by typing in this command:
adduser --disabled-login teamspeak
After creating your user, you can skip the user’s personal questions by Entering.
Next, to go to the home route, run this command:
cd /home/teamspeak
3- Download and Install TeamSpeak 3 server
You can download the latest version of TeamSpeak 3 software from their website or by running the Wget below:
https://files.teamspeak-services.com/releases/server/3.9.0/teamspeak3-server_linux_amd64-3.9.0.tar.bz2
4- Extract TeamSpeak 3 server and install
After downloading the file, unzip the installer file with this command:
tar xvf teamspeak3-server_linux_amd64-3.9.0.tar.bz2
Note: if you need to remove the downloaded file, use this command:
rm teamspeak3-server_linux_amd64-3.12.1.tar.bz2
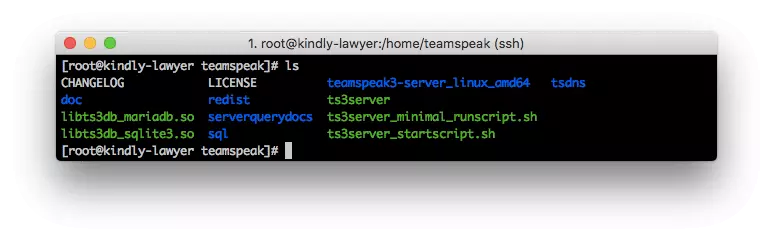
The unzipped folder includes all the essential TeamSpeak server content. Move this folder to home “cd teamspeak3-server_linux_amd64 && mv * /home/teamspeak”
Enter the “ls” command, and then a similar screen appears, which means the process went well.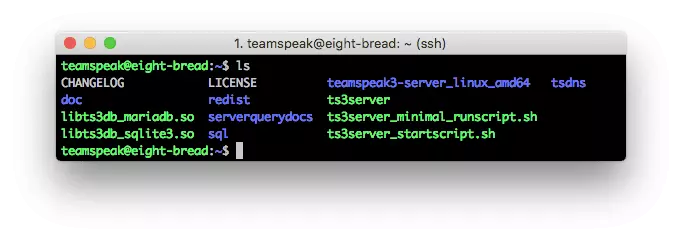
5- Accept TeamSpeak 3 terms and conditions
To run the server, you have to first accept the TeamSpeak 3 terms and conditions. The command below will accept the terms and conditions for you and create a new empty file:
touch /home/teamspeak/.ts3server_license_accepted
6- Start TeamSpeak 3 server
For starting the server on boot, you need to configure the TeamSpeak 3 server by creating a file called “TeamSpeak.service” in this directory “/lib/systemd/system.”
Type:
sudo nano /lib/systemd/system/teamspeak.service
This file should include:
[Unit]
Description=TeamSpeak 3 Server
After=network.target
[Service]
WorkingDirectory=/home/teamspeak/
User=teamspeak
Group=teamspeak
Type=forking
ExecStart=/home/teamspeak/ts3server_startscript.sh start inifile=ts3server.ini
ExecStop=/home/teamspeak/ts3server_startscript.sh stop
PIDFile=/home/teamspeak/ts3server.pid
RestartSec=15
Restart=always
[Install]
WantedBy=multi-user.target
Copy this script into an empty file and save it without an extension.
Next, activate the script on the server boot:
systemctl enable teamspeak.service
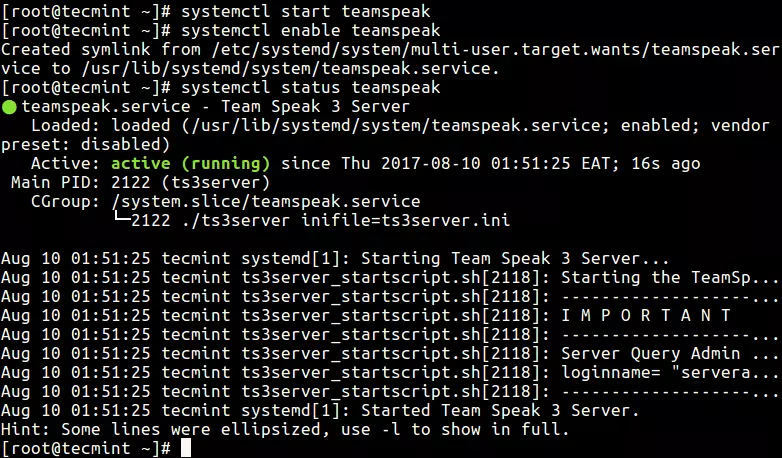
systemctl start teamspeak.service
This screen will appear when the TeamSpeak 3 server is proceeding correctly.
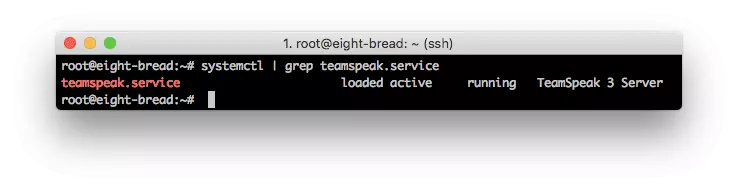
Now, to check if everything is up and running correctly type:
systemctl | grep teamspeak.service
This command,
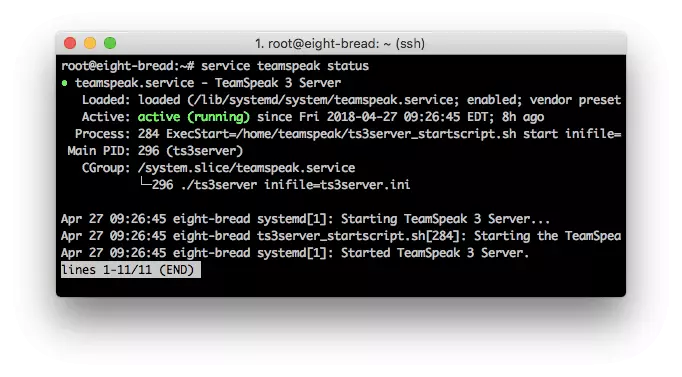
service teamspeak status
will check the server’s status in the final step.
7- Retrieve the privilege key
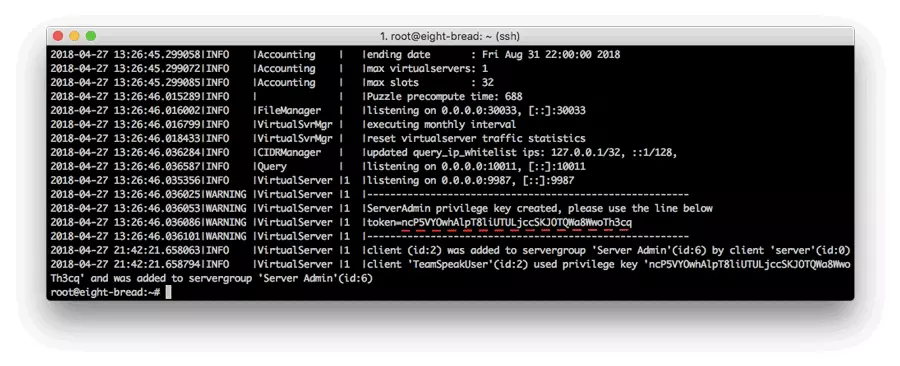
After the TS3server on Ubuntu runs successfully, execute the privilege key:
cat /home/teamspeak/logs/ts3server_*
Once you want to connect to the server.
8- Connect using TeamSpeak 3 client
Enter your VPS IP address, server password, and choose a nickname (Display name) to connect to the server.
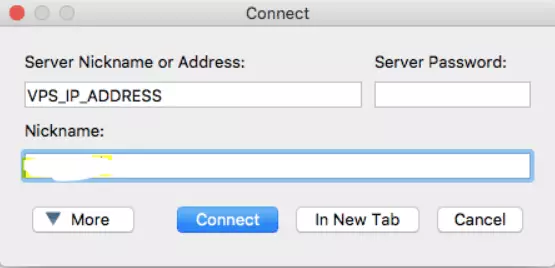
Then type in your privilege key and click on Enter.

How to setup TeamSpeak server on centos
Installing the TeamSpeak server on CentOS is similar to installing it on Ubuntu. Like the previous guide, you should first connect to your VPS through an SSH protocol to start with the installation process.
[rh-cta-centos type=”2″ ]1- Update the centos
First, you need to make sure your operating system is up-to-date. Update your CentOS 7 server packages and then install needed dependencies for the installation process by typing this command:
yum -y update
2- Add a new user
Then, create a user for the TeamSpeak server to run in user mode separately:
adduser teamspeak
Next, go to the new user’s home directory through this command:
cd / home / teamspeak
3- Download and unzip TeamSpeak 3 server program
There are two ways to download the updated TeamSpeak 3 server for CentOS. Either download TeamSpeak 3 server from TeamSpeak’s website or run the Wget command below:
wget http://dl.4players.de/ts/releases/3.12.1/teamspeak3-server_linux_amd64-3.12.1.tar.bz2
Then extract the update and move all of the files to the home directory:
tar xvf teamspeak3-server_linux_amd64-3.12.1.tar.bz2
cd teamspeak3-server_linux_amd64 && mv * /home/teamspeak && cd .. && rm -rf teamspeak3-server_linux_amd64-3.12.1.tar.bz2
Once the download completes, type IS in the screen below:
4- Accept the TeamSpeak 3 terms and conditions
Just like the previous guide, you need to accept Teamspeak’s license agreement. To do so, create this empty file:
touch /home/teamspeak/.ts3server_license_accepted.
You can now turn on the TeamSpeak 3 server and add it to startup.
5- Turn on the TeamSpeak 3 server
Start your TeamsSpeak3server on boot by following this script:
[Unit]
Description=TeamSpeak 3 Server
After=network.target
[Service]
WorkingDirectory=/home/teamspeak/
User=teamspeak
Group=teamspeak
Type=forking
ExecStart=/home/teamspeak/ts3server_startscript.sh start inifile=ts3server.ini
ExecStop=/home/teamspeak/ts3server_startscript.sh stop
PIDFile=/home/teamspeak/ts3server.pid
RestartSec=15
Restart=always
[Install]
WantedBy=multi-user.target
Save and close the file. Then start the TeamSpeak server and enable it to start automatically at system boot with these commands:
systemctl enable teamspeak.service
systemctl start teamspeak.service
To get the TeamSpeak 3 server report type:
service teamspeak status
Checks if everything is done successfully by this command:
systemctl | grep teamspeak.service
6- Retrieve the privileged key
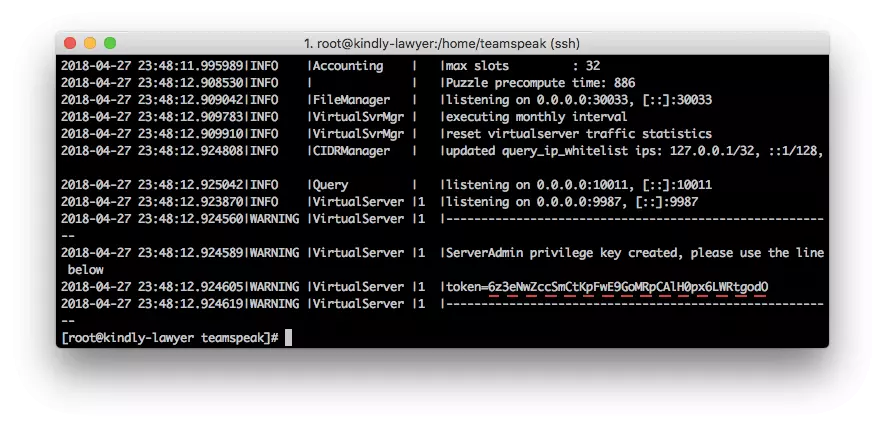
An administrator key will be generated the first time you run the TeamSpeak server. Use this key to connect to the server via a TeamSpeak client. Run this command to copy the TeamSpeak 3 server token:
cat /home/teamspeak/logs/ts3server_*
7- Establish a new connection by TeamSpeak 3 client
The last step is to connect to your server via the TeamSpeak client. Put in your VPS IP address in the server Nickname or address field.
Next, paste in the copied privilege key.
You are all set up and ready to go!
How do I Build a TeamSpeak Server?
The entire process begins by accessing your VPS via SSH and can be broken down into 6 easy steps.
- Build a new system user
- Download and extract TeamSpeak 3 server
- Accept the TeamSpeak license agreement
- Start TeamSpeak server
- Retrieve the privileged key
- Connect via TeamSpeak client
To Recap
You now know everything about setting up a TeamSpeak server on Linux, whether you are working with Debian, CentOS, or Ubuntu. TeamSpeak is a convenient live chat solution. You can use it to connect with your team members, friends, and other contestants on any gaming platform. Setting up a TeamSpeak server on Linux is actually easy once you learn the installation process. Follow this guide step-by-step, and you’re good to go.
If you come across any difficulties in the setup process, contact our support technicians. We will be happy to help!

It’s like you read my mind! You appear to know so much about the TeamSpeak server, like
you wrote the book in it or something.